
Building a homemade DIY ventilation system using found components can be a fun and practical project. I needed to upgrade from the wilting homemade DIY cardboard ventilation system I created last year and needed something more durable, yet did not want to spend too much on making one. Better yet, spend nothing at all! A plastic container and other plastic parts I needed. I just happened to find these items thrown out. One person’s trash is another person’s treasure. Here’s a step-by-step guide to make your own DIY ventilation system:
Materials Needed:
- 9-inch electric fan (this one was reused from the one I had before)

- Storex Plastic Archive Storage Box with Lock

- Exhaust hose from a portable air conditioner

- Hot glue gun and glue sticks
- 1/4-inch plywood board
- Cutting tools (e.g., utility knife, saw)
- Measuring tape or ruler
Steps:
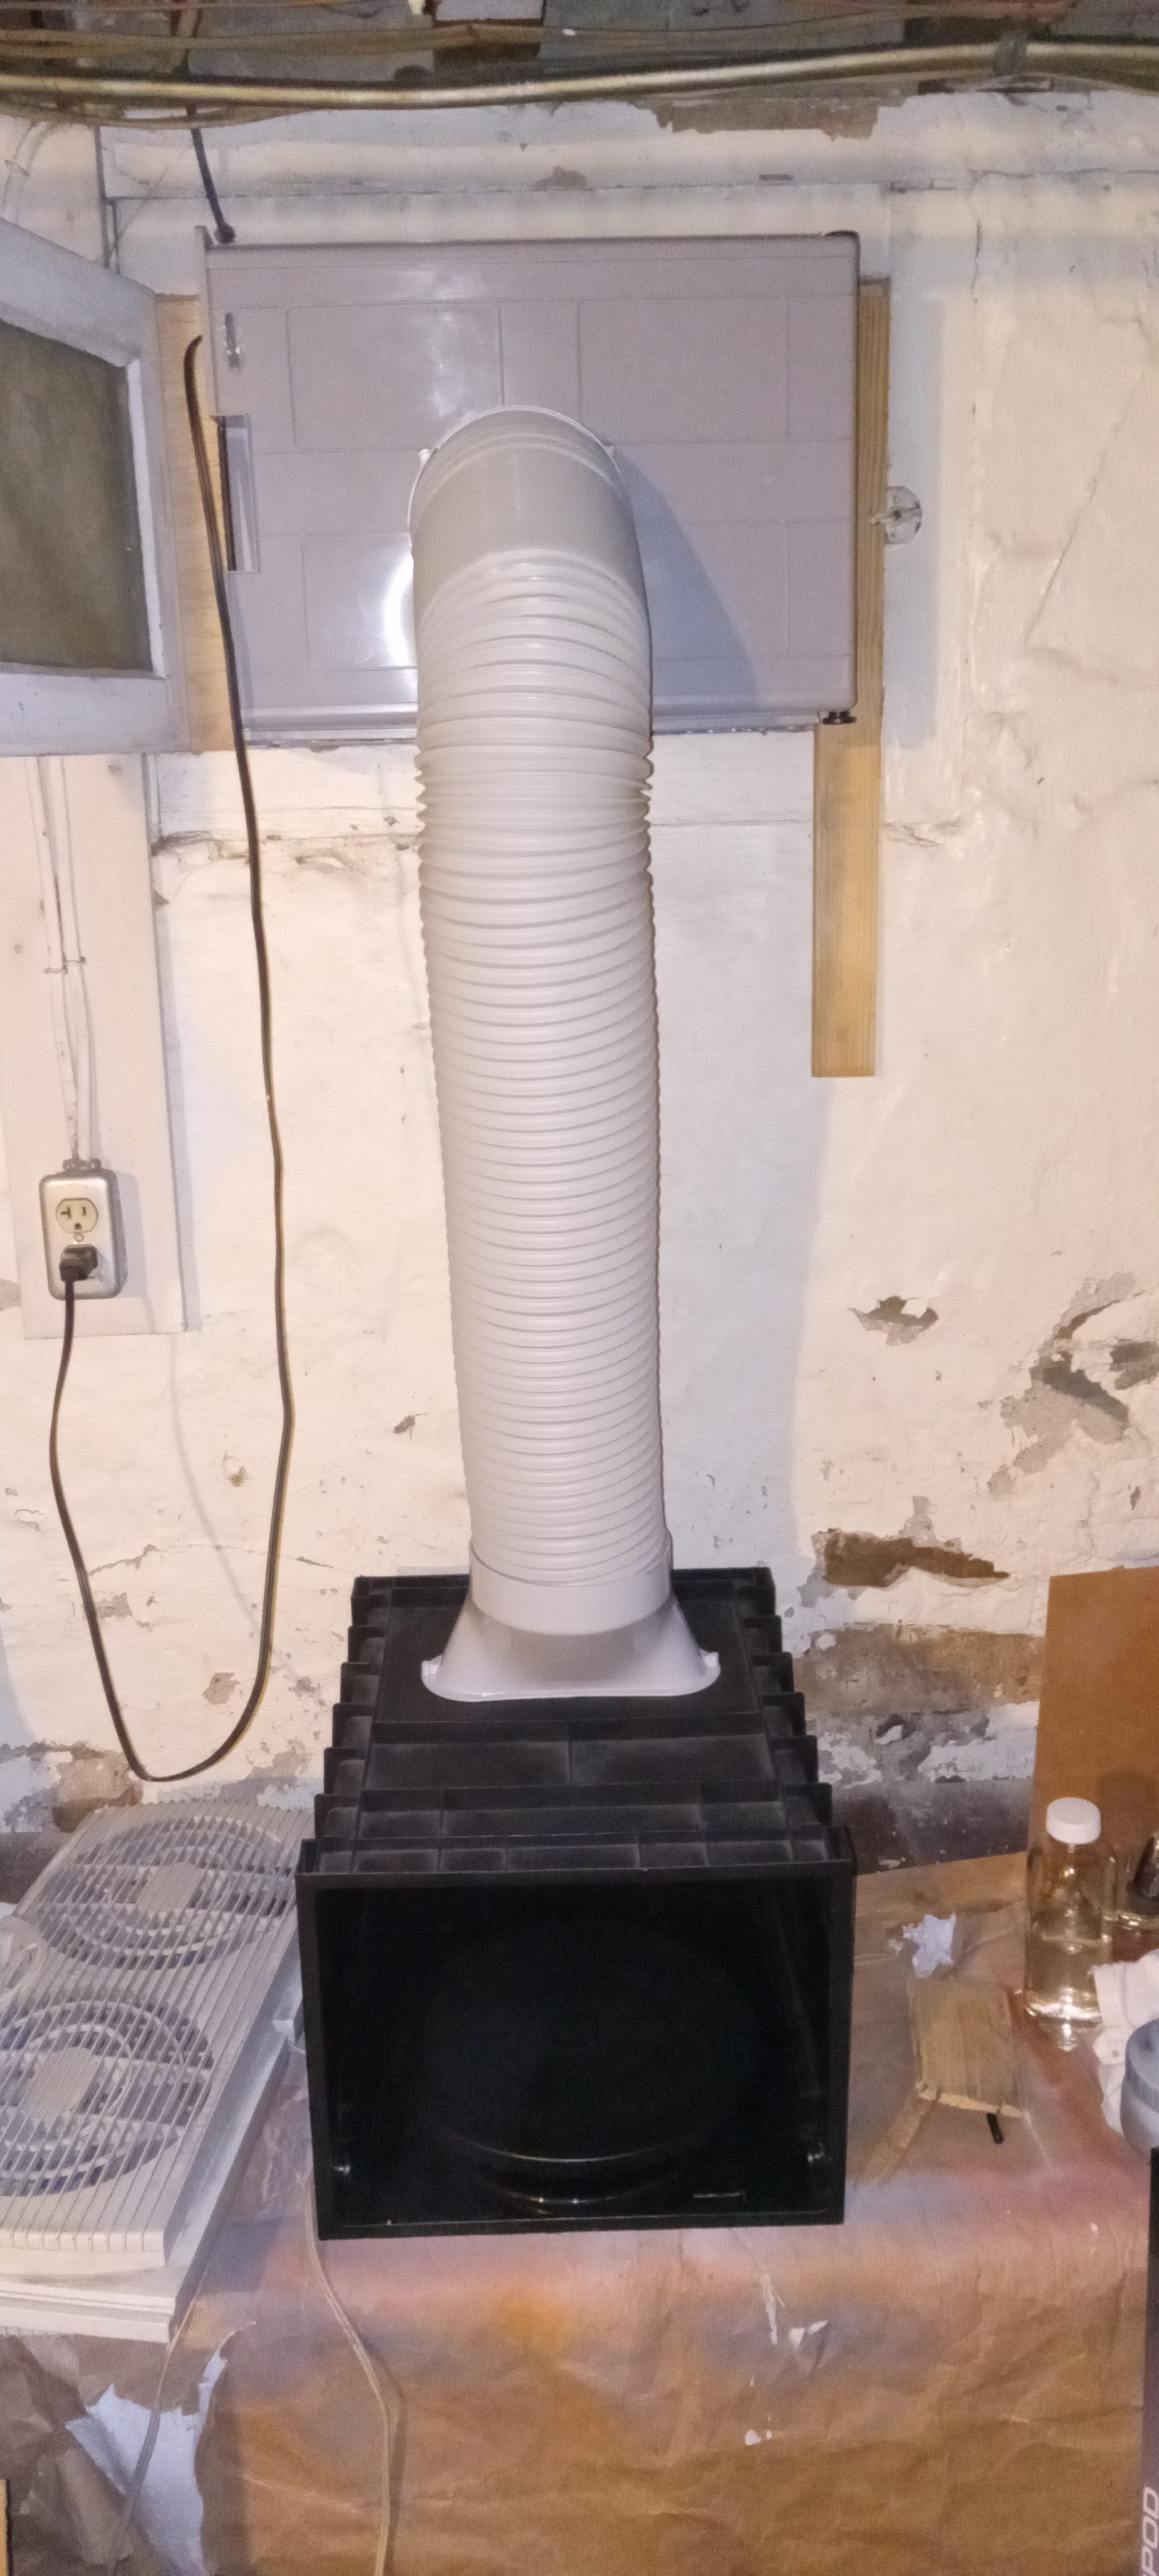
1. Prepare the Storage Box:
- Measure and Mark: Determine where you want to attach the exhaust hose to the storage box. Measure the diameter of the hose openings and mark the corresponding spots on the storage box.
- Cut Holes: Carefully cut out holes in the storage box that match the size and shape of the hose openings. Ensure the cuts are precise to create a snug fit for the hose.


2. Attach the Exhaust Hose:
- Fit the Hose: Insert the exhaust hose into the holes you cut in the storage box. Make sure the hose fits securely.
- Seal with Hot Glue: Use a hot glue gun to seal the edges of the hose where it meets the storage box. This will prevent air leaks and ensure a stable connection.


3. Prepare the Fan Subassembly:
- Cut the Plywood Board: Cut a piece of 1/4-inch plywood board to the size needed to mount the 9-inch electric fan to the window you will use for ventilation. Measure the window and then cut board to that specific size to fit it. Test fit the board against the window and see how you can keep it from falling in or out of the window. You can use the window to clamp it down in place. If not, experiment before going on to the next step until it fits without falling.
- Attach the Fan: Before attaching fan onto board, cut out a hole the same size as the fan if not smaller so it can fit snuggly. Secure the fan to the plywood board using screws if able, if not, hot glue it like I did. Make sure the fan is firmly attached and centered on the board over the hole you just cut out.


4. Attach the Fan Subassembly to the Storage Box:
- Position the Fan: Place the plywood board with the attached fan onto the large opening of the grey part of the storage box (the opposite side of the hose opening). Ensure the fan is positioned to effectively ventilate the box. Don’t forget to switch the fan on (unplugged) and in the “high” position. The only way you will turn it on is by plugging it into the electrical socket. Ensure that the airflow is going away from the box. This part of the system is to be attached to the window and the airflow must face out the window. Also, don’t forget to lead the plug and cord through the hole the lock left (you have to enlarge the hole and then repatch it with glue).
- Secure with Hot Glue: Use hot glue to attach the plywood board to the storage box. Apply glue generously around the edges to ensure a strong bond. And fill any holes like the ones the locking mechanism left after you took it out.


5. Final Assembly:
- Check Connections: Ensure all connections are secure and there are no gaps or leaks.
- Test the System: Plug in the electric fan and test the ventilation system. Check for proper airflow and make any necessary adjustments.
Misc.
Throw in an 11-inch spinning turntable for airbrushing your models!

Tips:
- Safety First: Always be cautious when using cutting tools and hot glue. Wear protective gear as needed.
- Precision Matters: Accurate measurements and cuts will ensure a better fit and more efficient ventilation.
- Secure Connections: Make sure all components are securely attached to prevent any parts from coming loose during operation.
By following these steps, you should have a functional homemade ventilation system using the components you have on hand. Happy building! If you have any questions or need further assistance, feel free to ask.
Now you have built your own DIY ventilation system with found items!

Update 18DEC24!
I’ve decided to replace the small work area and replaced it with a larger one, which was formerly a storage bin. This one I had laying around in the house. The benefit of this size is that you can work larger like I do with 1:350 scale models.


Leave a Reply